
Belt Speed Troubleshooting Guide for Conveyor Systems
A conveyor that suddenly starts running too fast, too slow, or inconsistently can bring an entire production line to a halt. In many plants, the first reaction is to replace parts or increase the motor speed. Experienced maintenance engineers take a different approach. They identify the symptom, inspect the system methodically, and solve the actual cause before changing any components.
Many belt speed problems are not caused by the belt itself. Incorrect pulley ratios, belt slip, worn pulleys, poor alignment, overloaded conveyors, and even transfer point restrictions can all affect conveyor performance. Replacing motors or changing pulleys before finding the real fault often leads to unnecessary downtime and additional maintenance costs.
The first step in any troubleshooting process is verifying the actual operating speed. Maintenance teams commonly use the Belt Speed Calculator to compare the expected belt speed with the measured operating speed before beginning mechanical repairs.
This guide walks through a practical troubleshooting process used by maintenance engineers to identify belt speed problems, diagnose the root cause, and restore reliable conveyor operation with confidence.
Common Conveyor Symptoms That Require Troubleshooting
Every troubleshooting job begins with observing the symptoms instead of guessing the cause. Two conveyors may appear to have the same problem, but the root cause can be completely different.
Common belt speed-related symptoms include:
- The conveyor is running slower than expected.
- The conveyor is running faster than expected.
- Material is spilling from transfer points.
- The belt is slipping during startup.
- Production throughput has decreased.
- The motor appears overloaded.
- Excessive dust is generated during operation.
- The conveyor speed fluctuates during production.
Each symptom requires a structured inspection rather than an immediate component replacement. The objective is to identify the actual fault before making any modifications.
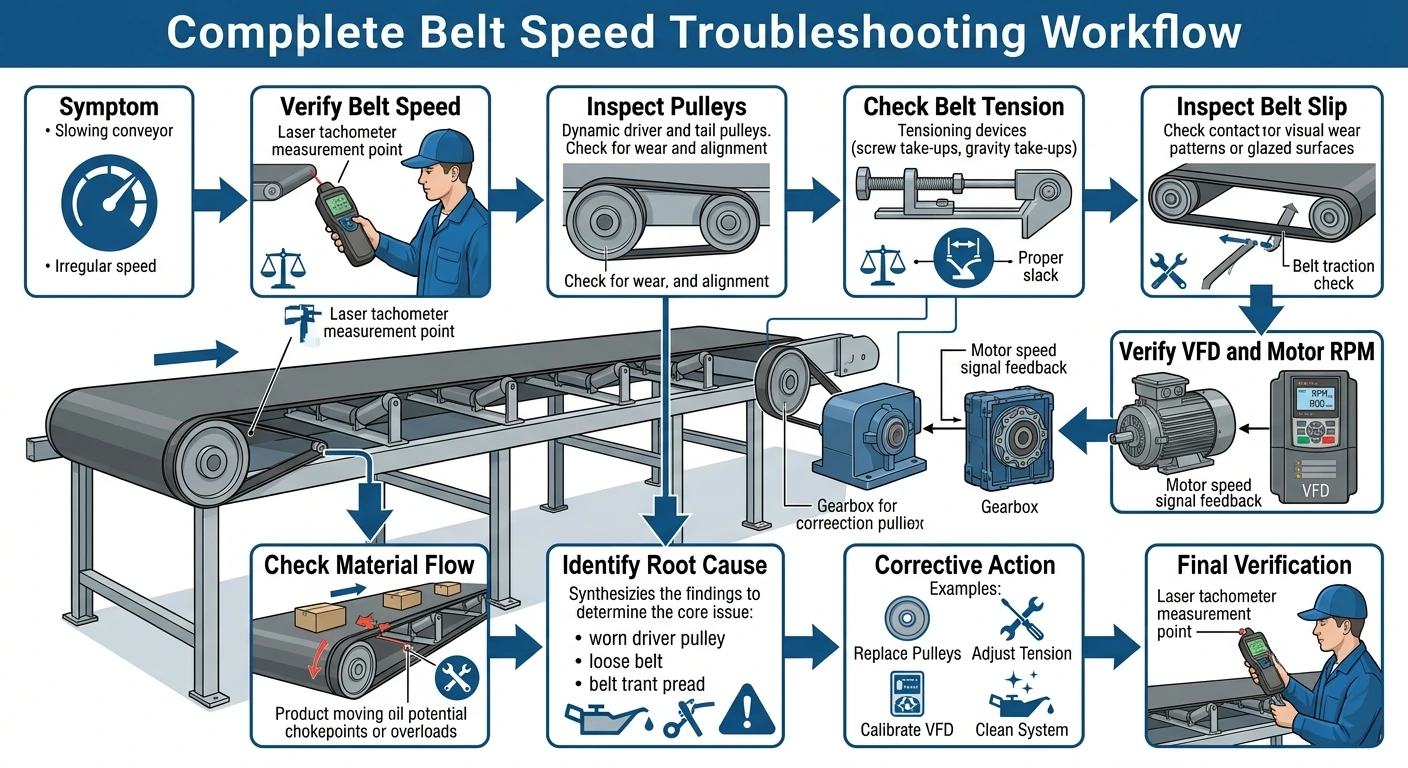
Step 1: Verify the Actual Belt Speed
Before adjusting pulley sizes or changing motor settings, confirm that the conveyor is actually operating at the speed you believe it is. Assumptions often lead to unnecessary repairs.
A simple troubleshooting sequence is:
- Measure the driver pulley diameter.
- Measure the driven pulley diameter.
- Verify motor RPM.
- Calculate the expected belt speed.
- Compare the calculated value with the actual operating speed.
If the calculated speed matches the measured speed, the problem may be related to material handling rather than conveyor speed.
If the two values differ significantly, continue with a mechanical inspection before changing any components.
The articles How to Calculate Belt Speed and RPM to Belt Speed Formula and Calculation explain this process in greater detail.
Step 2: Inspect the Drive Components
Once the operating speed has been verified, inspect every component responsible for transmitting power to the conveyor.
Focus on the following areas:
- Driver pulley condition.
- Driven pulley condition.
- Pulley alignment.
- Belt tension.
- Motor coupling.
- Gearbox condition.
- Variable Frequency Drive (VFD) settings.
Small mechanical problems often create noticeable speed variations. For example, a worn pulley or incorrect belt tension may reduce effective belt speed even though the motor continues running at its rated RPM.
If pulley wear or alignment problems are discovered, review Pulley Wear Symptoms and Pulley Alignment Problems before replacing components.
Step 3: Inspect the Belt and Material Flow
If the drive system appears to be operating normally, shift your attention to the conveyor belt and the way material moves through the system.
During field inspections, maintenance engineers commonly check:
- Belt tracking.
- Belt slip.
- Loading consistency.
- Transfer point restrictions.
- Belt cleaner performance.
- Material buildup on pulleys.
- Condition of the belt surface.
Many production problems are caused by poor material flow rather than incorrect belt speed. Increasing or reducing conveyor speed without correcting these issues usually provides only temporary improvement.
| Symptom | Most Likely Cause | First Inspection | Recommended Action |
|---|---|---|---|
| Belt running too slow | Belt slip or incorrect pulley ratio | Check pulley diameters and belt tension | Correct pulley ratio or tension |
| Belt running too fast | Incorrect pulley modification or VFD setting | Verify pulley sizes and motor frequency | Restore correct operating speed |
| Material spillage | Poor loading or excessive belt speed | Inspect transfer points | Correct loading conditions |
| Speed fluctuation | Drive or electrical issue | Inspect VFD and motor load | Repair the root cause |
Step 4: Compare Calculated Belt Speed with Actual Performance
After inspecting the mechanical components, compare the calculated belt speed with how the conveyor performs under normal operating conditions. This is an important step because a conveyor can run at the correct speed and still fail to deliver the expected production.
For example, the Belt Speed Calculator may confirm that the conveyor is operating at 2.8 m/s, but operators still report reduced throughput. In situations like this, the speed is usually not the real problem. Material loading, transfer point restrictions, or downstream equipment may be limiting production instead.
Experienced maintenance engineers always compare three things before making adjustments:
- The calculated belt speed.
- The measured operating speed.
- The actual production performance.
Only when all three values are reviewed together can the root cause be identified with confidence.
If the calculated speed differs from the measured speed, review Common Belt Speed Calculation Mistakes to rule out incorrect measurements or calculation errors before replacing components.
Step 5: Verify Supporting Equipment
A conveyor is only one part of a complete material handling system. Even if the belt is operating at the correct speed, another piece of equipment may be creating the problem.
Before making further adjustments, inspect:
- Feed hoppers.
- Transfer chutes.
- Discharge points.
- Downstream conveyors.
- Material feeders.
- Dust collection systems.
One maintenance shutdown I was involved in highlighted this perfectly. Operators believed the conveyor had become too slow because production had dropped during peak demand. After measuring the belt speed, we confirmed that the conveyor was running exactly as designed. The actual issue was a partially blocked transfer chute that restricted material flow. Cleaning the chute restored full production without changing the pulley ratio, motor speed, or gearbox.
That experience reinforced an important lesson: always inspect the entire conveying system before modifying conveyor speed.
Common Belt Speed Troubleshooting Mistakes
Many conveyor problems become more expensive simply because maintenance teams act too quickly. Replacing parts before identifying the root cause often increases downtime without solving the original issue.
The most common troubleshooting mistakes include:
- Replacing the motor before verifying belt speed.
- Changing pulley sizes without recalculating the new speed.
- Ignoring belt slip during inspections.
- Overlooking pulley alignment.
- Adjusting VFD settings without recording the original configuration.
- Ignoring operator feedback about when the problem started.
- Restarting production without monitoring conveyor performance.
Many of these issues are discussed in greater detail throughout the Belt Speed cluster, including How to Increase Belt Speed, How to Reduce Belt Speed, and Belt Slip and RPM Loss.
The troubleshooting steps discussed above are used daily in industrial plants. The following real maintenance example demonstrates how a systematic inspection can prevent unnecessary repairs.
Real Industrial Example
During a scheduled shutdown at a quarry, one conveyor repeatedly failed to meet its production target. The operations team believed the motor had lost power because the conveyor appeared slower than usual. A replacement motor was already being considered.
Instead of approving the replacement, the maintenance team followed a systematic troubleshooting process. They measured the actual belt speed, checked the pulley diameters, verified the Variable Frequency Drive (VFD) settings, inspected the gearbox, and examined the belt condition. Every component was operating within specification.
The investigation continued further along the conveyor, where engineers discovered heavy material buildup inside the loading chute. The restriction reduced material flow onto the belt, creating the impression that the conveyor had slowed down even though the measured belt speed remained unchanged.
After cleaning the chute and adjusting the loading point, production returned to normal during the next shift. No motor replacement, pulley modification, or gearbox repair was required.
This type of situation is common in industrial plants and demonstrates why experienced maintenance engineers troubleshoot the entire conveying system rather than focusing on belt speed alone.
Real-World Engineering Insight
One thing I've noticed over the years is that conveyor problems are often diagnosed too quickly. As soon as production drops, people assume the conveyor is running at the wrong speed. In reality, the belt speed is only one part of a much larger system.
I remember being called to inspect a conveyor that operators insisted had become slower over several weeks. The maintenance team had already discussed replacing the motor because they believed it was no longer producing enough power. Before approving the work, we followed a simple troubleshooting process.
We measured the motor RPM, checked the pulley diameters, verified the belt speed with calculations, inspected the Variable Frequency Drive (VFD), and monitored bearing temperatures. Every measurement confirmed that the conveyor was operating exactly as designed.
The real problem was discovered during a walk-through of the production line. A worn belt cleaner was allowing material to build up on the return side of the belt, while a partially blocked transfer chute was restricting material flow. Together, these issues reduced production and created the impression that the conveyor itself had slowed down.
After replacing the belt cleaner, cleaning the transfer chute, and carrying out a final inspection, production returned to normal without changing the motor, gearbox, pulley ratio, or belt speed.
That experience reinforced a lesson every maintenance engineer eventually learns: successful troubleshooting isn't about replacing the first component that looks suspicious. It's about collecting evidence, following a logical inspection process, and fixing the actual cause of the problem.
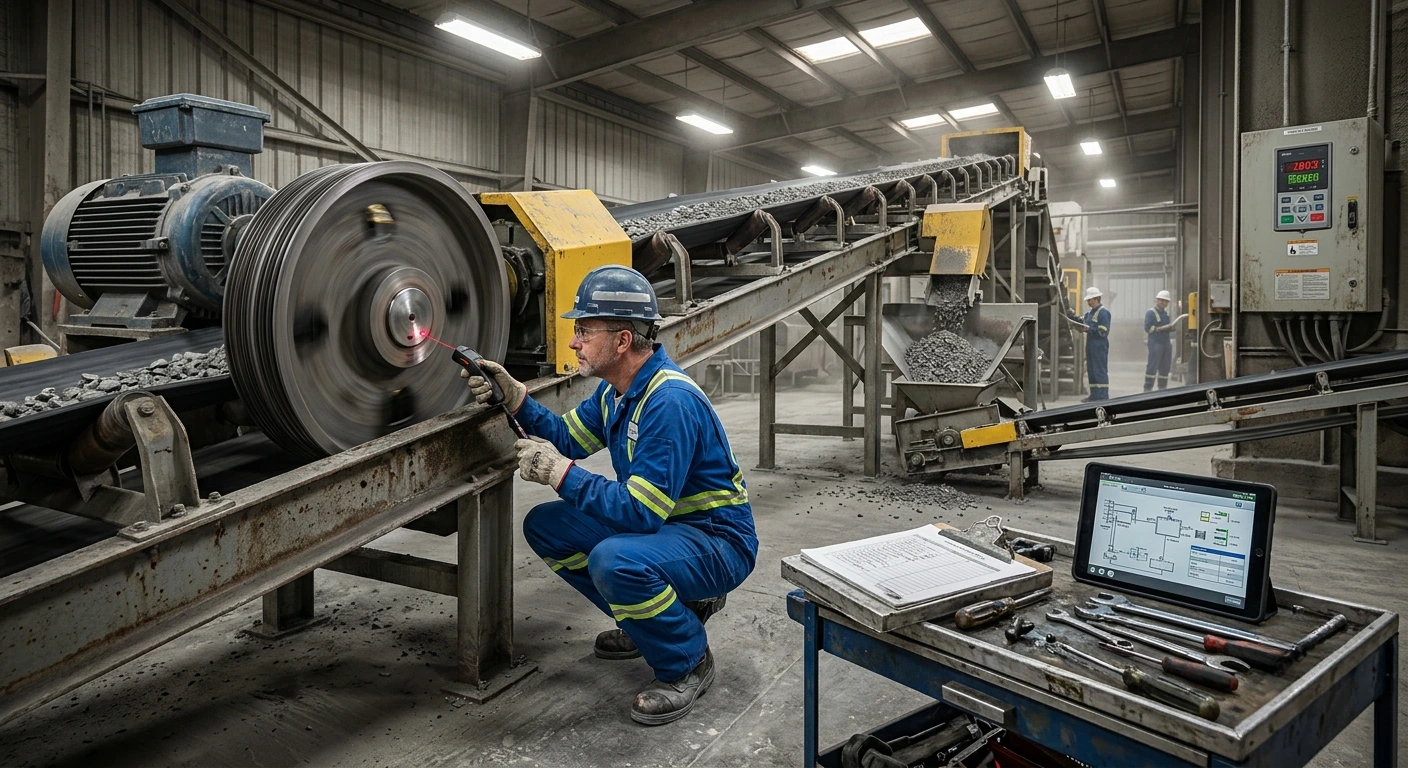
Every conveyor behaves differently depending on the application, material, and operating environment. The following questions address common situations encountered during real industrial troubleshooting.
Frequently Asked Questions
What is the first step in belt speed troubleshooting?
The first step is to verify the actual belt speed. Measure the pulley diameters, confirm the motor RPM, calculate the expected belt speed, and compare it with the measured operating speed before replacing any components.
Why is my conveyor running slower than expected?
Common causes include belt slip, incorrect pulley ratios, worn pulleys, improper belt tension, overloaded conveyors, Variable Frequency Drive (VFD) settings, or restrictions elsewhere in the material handling system.
Can material spillage be caused by incorrect belt speed?
Yes, but not always. Material spillage may also result from poor loading, transfer chute problems, belt misalignment, or worn belt cleaners. The entire conveying system should be inspected before changing the belt speed.
Should I replace the motor if the conveyor speed drops?
Not immediately. Verify the actual belt speed, inspect the drive components, and identify the root cause first. In many cases, the problem is mechanical or related to material flow rather than motor performance.
How do engineers troubleshoot inconsistent conveyor speed?
Engineers compare calculated and measured belt speed, inspect pulleys, bearings, VFD settings, belt condition, material flow, and transfer points before deciding whether repairs or adjustments are necessary.
What tools are useful for troubleshooting belt speed problems?
Maintenance engineers commonly use a laser tachometer, tape measure or calipers for pulley measurements, belt speed calculations, thermal cameras for bearing inspections, and routine visual inspections to identify conveyor faults.
Conclusion
Successful belt speed troubleshooting is not about finding the quickest repair—it's about finding the correct repair. By following a structured inspection process, maintenance engineers can identify the true cause of conveyor problems, avoid unnecessary component replacements, and restore reliable production with confidence.
The most effective troubleshooting process is based on evidence rather than assumptions. Measuring operating conditions before replacing components helps maintenance teams reduce downtime, avoid unnecessary costs, and improve long-term conveyor reliability.
Whenever a conveyor appears to be running too fast, too slow, or inconsistently, begin by calculating the expected operating speed with the Belt Speed Calculator. Then use the guidance in How to Increase Belt Speed, How to Reduce Belt Speed, and Maximum Recommended Belt Speed to determine the safest and most effective solution for your conveyor system.
Recommended Next Steps
Now that you've learned a structured approach to troubleshooting belt speed problems, continue with these engineering resources to identify calculation errors, optimize conveyor performance, and improve maintenance decisions.